 |
Find your gardening zone and much more at plantmaps.com: |
Chico, CA Elevation: 195 ft
Chico, CA Frost Dates
Last Frost Date - April 23rd
First Frost Date - October 30th
Start indoor seeds 6 to 8 weeks before the Last Frost date.
Burpee Planting Guide California - Plant from seed in indicated months
 |

 |   |

 |  |

Chico/Durham Rainfall Charts - UC Davis Butte County Extension
Durham, Chico - Monthly Totals
| 2010 | 2009 | 2008 | 2007 | |||||
|---|---|---|---|---|---|---|---|---|
| Avg. Temps | Rain Total | Avg. Temps | Rain Total | Avg. Temps | Rain Total | Avg. Temps | Rain Total | |
| JAN | 51/42 | 7 | 58/36 | 2.48 | 50/37 | -1991.71 | 56/31 | 0 |
| FEB | 58/42 | 3.26 | 57/40 | 5.77 | 59/38 | -996.04 | 59/42 | 4.11 |
| MAR | 63/40 | 0.73 | 64/41 | 1.5 | 66/41 | -1997.71 | 72/44 | 0.27 |
| APR | 65/42 | 1.39 | 71/44 | 0.28 | 71/42 | -999 | 73/46 | 1.74 |
| MAY | 71/47 | 3.43 | 81/54 | 4.93 | 79/52 | 0 | 81/52 | -996.98 |
| JUN | 84/58 | 0.79 | 82/57 | 0 | 85/56 | 0 | 85/56 | 1.5 |
| JUL | 89/60 | 0 | 88/59 | 0 | 88/59 | 0 | 88/59 | 0 |
| AUG | 86/56 | 0 | 87/57 | 0 | 90/58 | 0 | 88/58 | 0 |
| SEP | 85/52 | 0 | 87/55 | 0 | 87/52 | 0 | 80/53 | -999 |
| OCT | 73/50 | 1.89 | 72/47 | 1.32 | 77/47 | 0.53 | 72/47 | 1.04 |
| NOV | 61/40 | 2.42 | 63/39 | 2.26 | 65/42 | 1.84 | 68/39 | -998.57 |
| DEC | 52/36 | 0.09 | 51/34 | 3.81 | 50/33 | 2 | 53/37 | -995.2 |
The Square Foot Gardening Foundation "January Gardening Activities" |


University of California Cooperative Extension Butte County
GARDENING IN DECEMBER
Master Gardener, Jane Faris UC DAVIS - Butte County Extension
Our December days are pleasantly cool and such weather makes it easier to tackle gardening chores.
Start or continue summer/fall cleanup activities. In the vegetable garden area, dispose of dead
or dying plants in the compost pile. If
you don’t compost, consider this a good time to add 2 to 3 inches of horse
manure to the vegetable gardening area.
As it decomposes over the winter it will add nutrients to the soil and
will help keep the soil from being compacted by winter rains.
Falling leaves are becoming a huge mess.
Make your raking efforts worthwhile by composting or shredding leaves
for mulch. In addition, clean up around
fruit trees. Remove leaves and old shriveled fruit from the ground. This will help reduce transmission of fungus
disease from last year’s crop to next year’s bloom and fruit.
The timing of pruning influences a tree’s response to pruning. Dormant pruning is the most invigorating
because it allows the carbohydrates that the tree has stored in its wood for
the winter to be allocated to the few growing points. Unlike summer pruning, dormant pruning does
not remove actively growing and photosynthesizing leaves. For a great website on pruning go to: http://homeorchard.ucdavis.edu/
Now is the time to plan your spraying program. Spray peach and nectarine trees as soon as
possible with a lime-sulfur or copper product to control peach leaf curl. Late in the month, roses can be pruned and
sprayed with a horticultural oil to kill over -wintering insects. Read spraying instructions and follow
directions carefully.
Note that many evergreens can be pruned this month and used in Christmas
decorations. The foliage of pines and
cedars and the berries of many holly species are widely used.
Lastly, December is a great month to ponder and plan. Pull out your gardening notes. Review
gardening problems and attempt to find solutions. Research landscape designs, possible plant
varieties, and send for seed catalogs.
Be adventurous and try something new!
If you would like
more information call the University of California Cooperative Extension Butte
County Master Gardeners at (530) 538-7201.
TOPIC OF THE MONTH: STARTING SEEDS INSIDE
Master Gardener, Jane Faris
UC DAVIS - Butte County Extension
WHY START SEEDS INSIDE?
You can get a head start on the growing season and grow varieties that are not readily available at the nurseries. Also, it can be cost effective.
WHAT TYPE OF SEEDS CAN BE STARTED INSIDE?
In general, you can grow slow-growth non root vegetables such as lettuce, cabbage, broccoli, cauliflower, peppers, eggplant, and tomatoes. Flowers include such annuals as marigold, zinnias, heliotrope, blue salvia, gloriosa daisies, celosia, nicotiana, petunias, and poppies.
Remember to choose vegetables and flowers that are easy to transplant. Also, consider sowing hybrid seeds because they often have increased vigor, better production, and have more disease resistant qualities.
WHAT IS THE PROPER TIME TO START SEEDS INSIDE?
Determine when you would normally plant outside (consider: last frost date, soil temperature and rate of seedling growth). Generally, plant seeds inside 6 to 8 weeks before you plan to transplant them to the garden.
WHAT TYPE OF CONTAINERS CAN BE USED?
There are many types of containers that can be used to start seeds inside. The most economical are recycled containers. Here is a brief list of useful items: margarine tubs, paper cups, newspaper cups, clay and plastic pots, cottage cheese containers, bottom of milk cartons and bleach bottles. New containers include plastic seed trays, peat pots, compressed and peat pellets, just to name a few.
Take note, if you choose recycled containers, take the time to sanitize them. Wash with soap and water and rinse them with a solution of 1 part bleach to 9 parts of water. Sanitizing will reduce the fungi and bacteria population found on recycled containers and hopefully prevent infecting your seedlings.
WHAT TYPE OF SOIL SHOULD BE USED TO START SEEDS?
The best type of soil should have these characteristics: fine and uniform in texture, well aerated and loose, free of insects, disease organisms, and weed seeds, low in soluble salts, and able to hold moisture yet able to drain well.
Remember garden soil is not a good medium to use because it is too heavy, not sterile, and does not drain well.
One mixture that contains the proper elements is the following combination.
1/3 sterilized sand
1/3 vermiculite or perlite
1/3 peat moss
There are many materials that can be used to start seeds. Experience will help you determine which one is best for your inside conditions.
WHAT ARE THE BEST SEEDING STEPS?
1. Fill container ¾ inch from the top with a moistened soil mixture.
2. When using a flat, make rows 1 to 2 inches apart. When different seeds are used in the same container, it is wise to plant them in rows. When one type of seed is planted they can be scattered over the surface.
3. The depth of the seed is usually 2 to 4 times the seed’s diameter.
4. Extremely fine seeds are lightly pressed into the soil medium and watered with a mist spray.
5. General rule: seeds other than the very fine seeds should be covered about 2 times their diameter.
6. Slip seed containers into plastic bags or cover with clear plastic wrap. This will help retain the soil moisture. Watering should not be necessary until seeds have germinated. Remove plastic when seeds sprout to allow air circulation.
7. Place seeds in a warm location. Generally 65 to 75 degrees is needed.
WHAT IS THE PROPER CARE FOR SEEDLINGS?
Temperature:
Place seedlings in a bright, airy, and cool location. The temperature should be kept at 55 to 60 degrees at night and 65 to 70 degrees during the day.
Lighting: When a bright window is not available, place the seedlings under a fluorescent light. Use preferably two 40 watt cool-white fluorescent tubes or grow lights. Position the plants 6 inches from the tubes. As seedlings grow the lights should be repositioned to keep the lights at the proper distance from the top of the plants. Keep the lights on 16 hours each day.
THINNING: Some plant seedlings will need to be placed into larger containers. Tomatoes, for example, should be thinned to one plant per pot after they get their first set of “true” leaves (those leaves appearing after cotyledons or seed leaves).
FERTILIZER: Use a soluble house plant fertilizer at a dilution recommended about every 2 weeks.
HARDENING OFF: Hardening off is exposing a plant that has been growing indoors to the outside. This process is accomplished by increasing the periods of time the plant is outside. Thus, when the plant is transplanted to the garden it can make the transition with a minimum of shock. In other words, when transplanting to the out of doors, make sure to gradually expose the plant to sunlight.
TRANSPLANTING TIP: Always try to transplant on a cloudy day. On warm sunny days, cover newly planted seedlings with a material (paper, cloth, etc.) folded in a tent design for two to three days. Also, try to not place transplant on windy days.
REFERENCES
Penn State College of Agriculture Sciences
Department of Horticulture
http://consumerhorticulture.psu.edu/files/seed_packets.pdf
University of California Agriculture and Natural Resources, Publication 3382, California Master Gardener Handbook, 2204.
University of Missouri Extension
Ray R. Rothenberger, Department of Horticulture
http://extension.missouri.edu/explore/agguides/hort/go6570.htm
University of Illinois Extension, The Plant Palette
Jennifer Schultz Nelson, Unit Educator, Horticulture
http://web.extension.uiuc.edu/macon/palette/070114.htm1
 |
Instructions on how to order FREE SEEDS from the USDA ARS
Figure out the Botanical name for the plant you want here:
http://www.backyardgardener.com/names/index.html
Then, go here:
http://www.ars-grin.gov/npgs/stats/
Then for example, click "Lettuce" and you will go here:
http://www.ars-grin.gov/cgi-bin/npgs/html/stats/genus.pl?Lactuca:lettuce
Then click "Latuca Sativa" and you will go here: (latuca sativa - romaine lettuce)
http://www.ars-grin.gov/cgi-bin/npgs/html/taxon.pl?21360
Then click "LIST" "all available (and unavailable ) NPGS accessions by country" and you will go here:
http://www.ars-grin.gov/cgi-bin/npgs/html/tax_stat.pl
Then click "United States", and you will go here:
http://www.ars-grin.gov/cgi-bin/npgs/html/tax_stat.pl?taxno=21360&country=United%20States&unavail=&type=
And boom!!!! over 500 kinds of Romaine lettuce in their common name! Who knew!!
Apparently, they are all cultivars, and I believe we can save seeds from these, and that they are not GMO, but if you have more info on this, please contact me and let me know.
So click on one of the lettuce options, and it goes to a page where it says you will receive about 200 seeds, and you click Request this Germplasm, and you will go here:
http://www.ars-grin.gov/cgi-bin/npgs/acc/request.pl?action=add&acid=1025732
Then you can search for more (try getting a dozen at least, I have no idea what the limit is!), or complete the form, and apparently, it takes about a month and you will get free seeds!!!
Let me know how it works out for you, or anything else I need to put in these instructions - thank you!
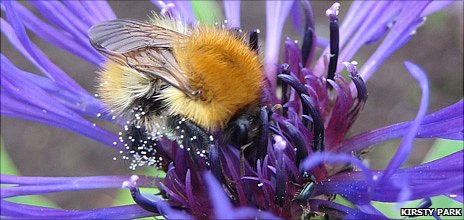
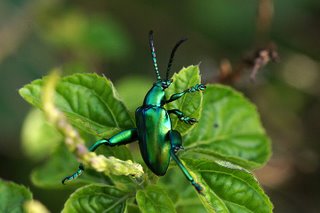
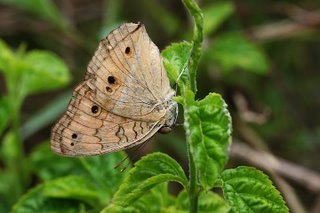
HOW TO GET AN ARMY OF BENEFICIAL INSECTS
TO PROTECT YOUR GARDEN
Master Gardener, Cecilia Secor
UC DAVIS - Butte County Extension
Are caterpillars chewing on your cabbage? Aphids browsing your Brussels sprouts? Cucumber beetles snacking on your squash? Keeping insect pests from attacking your garden veggies can be a problem, but help is on the way: Just invite your neighborhood beneficials to the banquet in your garden.
Beneficials are insects that help gardeners by making their living from garden pests in two main ways: by parasitizing them or by preying on them. Parasitic beneficials depend on pest insects for survival because they must lay their eggs in or on them. Their immature stages develop in or on the pest insect, feeding on its body and killing it. Predators are adult beneficials that eat pest insects.
You don’t need to order beneficials from a garden catalog; most are already present in your garden. Your job is to give them the food, water, and shelter they need to thrive, and they will reward you by patrolling your garden.
Here are eight things you can do to attract beneficial insects into your garden and keep them there.
- Avoid the use of pesticides. Pesticides tend to be indiscriminate, killing beneficial insects as well as insect pests. If chemical control is necessary, use the least disruptive materials, such as soaps, oils, microbials, or botanicals.
- Create a garden that celebrates diversity. Include both annual and perennial ground covers, shrubs, trees, turfgrass, and some permanent arrangements, such as stone paths and decorative rock accents, which will provide shelter for insect predators. Clumps of native grasses make good overwintering sites for a variety of predatory insects.
- Plant lots of different kinds of flowers. Flowers provide pollen and nectar that beneficials need and that will sustain them when pest populations are low. Flat-topped flowers, such as dill, parsley, cilantro, and Queen Anne’s lace, are especially attractive to tiny parasitic wasps--some of the most effective beneficial insects in the garden.
- Provide water. A shallow dish of water with pebbles or gravel in it placed in a sheltered area will give small beneficials a safe place to drink.
- Plan for a full season of bloom. Keep beneficials in your garden year round by including varieties of flowering plants that bloom throughout the year.
- Go native. Allow some corners of your yard to grow naturally. Native beneficial insects love native vegetation.
- Tolerate a small number of pests. This will provide a continuous food supply for beneficials. Try “sacrificing” some plants in the garden, or if resorting to pesticides, make spot-treatment applications, leaving reservoirs of pests on which beneficials can survive.
- Eliminate ants. Ants interfere with the ability of predators to control aphids and scales. Applying a sticky material such as Tanglefoot to the bases of infected plants will keep ants away.
For more information on beneficial insects there is a great book Natural Enemies Handbook: The Illustrated Guide to Biological Pest Control that you can order through ANR at http://anrcatalog.ucdavis.edu/.